
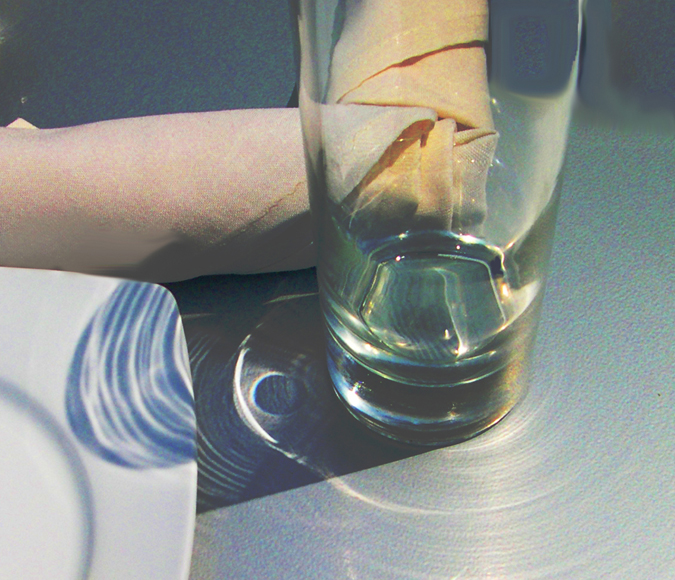
Moment To Remember 13
Acrylic on paper
by Linda Rothchild Ollis
The above photo is one of a series of glass paintings,
that was developed the same way I developed the lesson below.
The original photo, was just as gray as the photos below.
I added the warm colors when I painted it.
At the Watercolor Society of Oregon Spring Convention, I had
the pleasure of teaching my fellow WSO members
"Basic Photoshop Elements for Artists".
As I promised, here is a review of the lesson.
The laptop participants at the workshop received my “Commands for Glass on Table.pdf” file
with the step-by-step instruction and the original photo.
If you would like this .pdf file and the photo, so you can follow the
lesson on your computer, contact me at lindasteve(at)centurytel.net.

This photo was taken on
a sunny day. The subject
matter did not provide very
much color, but I was
immediately drawn to the
lights and darks in the reflected
light rings.

After evaluating parts of
the photo with the Zoom
Tool I decided this selection
had potential for an
interesting composition.
Step 3 - Crop Tool
I cropped and saved this as "Crop 1".

It was early Spring when I took these photos.
Feeling the warmth of the sun, after a cold,
Northwest winter, I knew this painting would
have a warm color palette. I added
warm colors to the grays that were in the
original photo by adjusting
the hue saturation and color curves.
 Step 5 - Threshold and Values
Using the "Threshold" feature, I could see
a potentially interesting composition by eliminating
the dark shadow and white plate in the upper
right hand corner.
Step 6 - Clone Tool and Smudge Tool
The dark color on the upper left corner of the photo was
cloned and painted on the upper right corner of the photo.
The Smudge Tool blended the dark cloned area of the table
with the light area of the table.

The area around the base of the glass was selected with the
Elliptical Marquee Tool and darks were added to the midtones
in just that selection.
This helps to bring the viewers eye to this area which now has
the darkest darks next to the lightest lights.
This is the area of refected lights from the glass that first inspired me.
So, I am moving in the right direction!

This step was added after the workshop (and is not included
in the step by step instructions), because I liked
this composition better.
The darkest dark next to the lightest light is the center of
interest that I want the viewer to look at first.
Since it was very close to the middle of the image, I knew
it would need to be moved to the right, left, up or down. Placing the
center of interest in one of the four quadrants of the painting
usually creates a more interesting composition. So, I cloned
more of the existing photo to the top and the left sides of the photo
to adjust the placement of the center of interest.
Comments