The Watercolor Society of Oregon had its Fall Convention
in Salem this weekend. I had the pleasure of teaching
some of my fellow WSO members "Basic Photoshop for Artists".
As I promised, here is the beginning of the lesson review on this blog.
During this week I will continue to post the steps we did in the lesson
until it is complete.
If you have Adobe Photoshop Elements on your computer, join us!
Menu Bar refers to the bar at the top of the screen with the headings
File, Edit, Image, etc.
When I show Menu Bar >File> that means click File and
continue clicking on each item that follows the ">" sign.
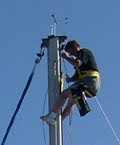
We started by opening the photo below (use your own photo,
if you want to follow along):
Menu Bar>File>Open>Photos1>Click on "Life at the Top"
Look for name "Life at the Top" (on your desktop) in "File Name" box
>Click Open

Tool Box
Click on Zoom Tool. Move your cursor onto the
screen. See the magnifying glass with the + in it.
Look at the Options Bar(the area directly below
the Menu Bar> Click "Fit Screen".
Now you should see the entire photo.
Click and drag the Zoom tool creating a square to
zoom in on Barry who is at the top of the mast,
adjusting the rigging.
Now use the pointer finger on your left hand
to press the Alt key down and see that the
Zoom has changed from plus " +" to minus "-".
This is another way to Zoom out.
This exercise is a great way for artists to explore
a photo in depth and find subject matter they might miss
when looking at a photo in it's original size.
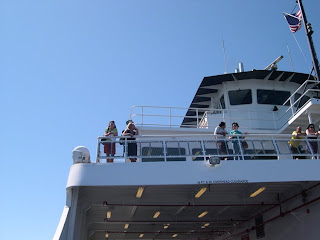
In the next post, we will explore how to use a grid, rotate,
and crop with the photo below:
in Salem this weekend. I had the pleasure of teaching
some of my fellow WSO members "Basic Photoshop for Artists".
As I promised, here is the beginning of the lesson review on this blog.
During this week I will continue to post the steps we did in the lesson
until it is complete.
If you have Adobe Photoshop Elements on your computer, join us!
Menu Bar refers to the bar at the top of the screen with the headings
File, Edit, Image, etc.
When I show Menu Bar >File> that means click File and
continue clicking on each item that follows the ">" sign.
We started by opening the photo below (use your own photo,
if you want to follow along):
Menu Bar>File>Open>Photos1>Click on "Life at the Top"
Look for name "Life at the Top" (on your desktop) in "File Name" box
>Click Open

Tool Box
Click on Zoom Tool. Move your cursor onto the
screen. See the magnifying glass with the + in it.
Look at the Options Bar(the area directly below
the Menu Bar> Click "Fit Screen".
Now you should see the entire photo.
Click and drag the Zoom tool creating a square to
zoom in on Barry who is at the top of the mast,
adjusting the rigging.

Now use the pointer finger on your left hand
to press the Alt key down and see that the
Zoom has changed from plus " +" to minus "-".
This is another way to Zoom out.
This exercise is a great way for artists to explore
a photo in depth and find subject matter they might miss
when looking at a photo in it's original size.
In the next post, we will explore how to use a grid, rotate,
and crop with the photo below:

Comments